An editor to write code
People have come up with special editors for writing code effectively. Some of these are very simple and lightweight, others have tons of functionality and are very complex (these are called IDEs, an acronym for Integrated Development Environment).
The most popular code editors for Python are:
- Atom (an open source editor made by GitHub)
- Visual Studio Code (an open source editor made by Microsoft)
- PyCharm (a commercial Python IDE made by JetBrains)
At the beginning, you will use Visual Studio Code (VS Code).
Setting up VS Code for Python
Click on the Extensions menu on the left, search for “python” and install “Python by Microsoft”:
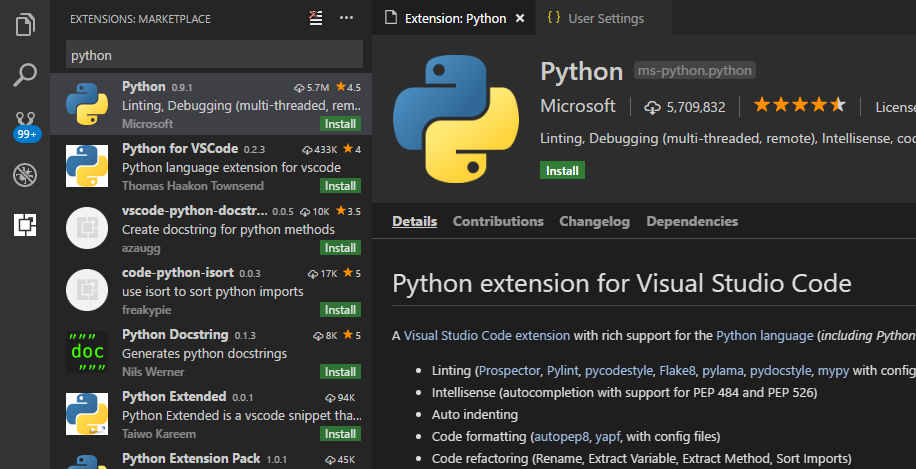
Please note that this Python extension assumes you have a certain linter (pylint) installed. Please disable this linter for now, we will deal with linters later.
You might notice, that VS Code will still use Python 2. To fix this issue, do the following:
- Open your User settings by clicking File -> Preferences -> Settings.
This should open 2 files, one called “Default Settings”
(you can close this one), the other one
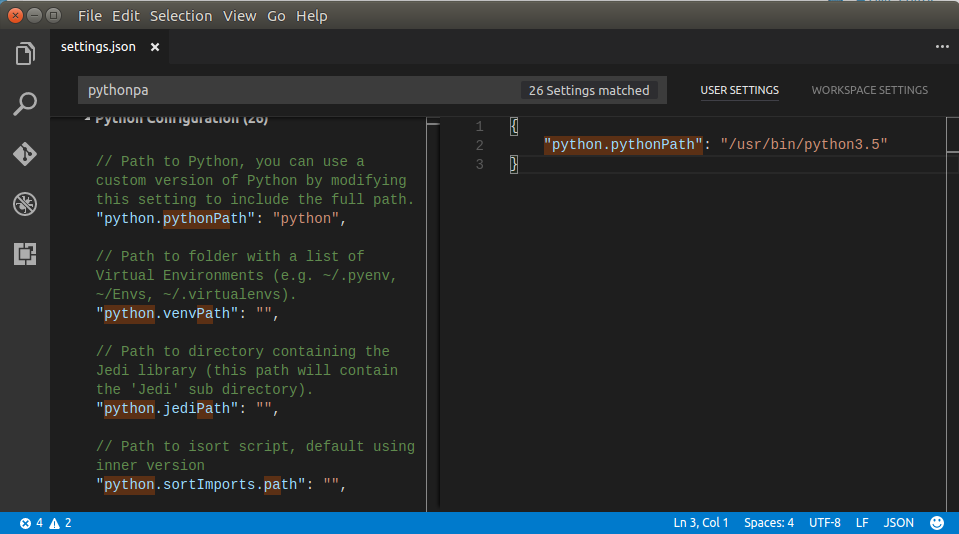
settings.json - Add the following to settings.json and save the file:
"python.pythonPath": "/usr/bin/python3.5"- NOTE : you should write here the version of Python you use!
For example, write here
/usr/bin/python3.6if you use Python 3.6)
- It should look like this:
Done! VS Code should use Python 3.x now.
How to run your code
- Make a folder where you will keep your code
- Open this folder in VS Code with File -> Open Folder
- Create a python file by clicking the new icon next to the folder name. Make sure this has a
.pyextension! - Write here some code, for example,
print("Hello World!") - Run this script by right-clicking in the editor area and select “Run Python file in Terminal”. You should see a terminal pop up in the bottom displaying the output of your script.